

Hello Y’all!
Some of you know that I have been working on my office/filming room/where Husfriend keeps some of his clothes room.
My friend Mary and her son, Andrew helped me paint. (It was Mary’s only day off in like forever, I’m so thankful she spent it with my and a gallon of fancy paint.) It was supposed to be an Essie “Do You Take Lei Away” beige nude color on the walls… turned into a paler version of Zoya “Rue”. At first, I was rather cranky about it. After a few days, I embraced the dusty rose and when for it.
I wanted to do this room on kind of a budget. That meant getting DIY. What I wanted and what I could have, were as different as Budweiser and Dom Perignon. (Even though Budweiser is apparently the champagne of beers. It says so on the label. They couldn’t say it, if it weren’t true, right?)
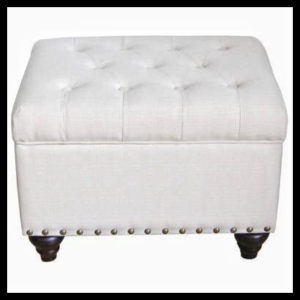
(This was my inspiration.)
The Lack Table is about $8. Depending on which one you choose. The Husfriend surprised me with the brown/black one. I liked the table well enough, but then Pinterest invaded. And I knew what I had to do…. UPHOLSTER the dang thing! I researched how to tufted, make buttons, tacking… all sorts of things.
And this is the story of it.
First, we made the buttons. Let me rephrase that. Husfriend made the buttons. It was quite a task in the beginning, but once we come the form to embiggen the faux leather buttons were done. It took him 5-10 minutes each. I then, thread each of them with doubled up jewelry wire to stick through the table for tufting.


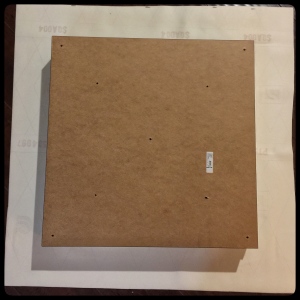
Second, I marked and”drilled” the holes in the table. I used a Dremel. The table is hollow.. so, you have to line up the holes. I think we hammered a long needle (You’ll see them soon, they are a lifesaver) to make indentations on the under side. All this is done with the legs on the table. I just makes it easier.


Third, I removed the legs and attached the foam. Luckily, Joann’s has a piece of foam that fits perfectly. You can get camping foam that is about the same price and you can upholstery 2 tables from it. I didn’t want to fart around with cutting foam. Next, I secured it with leftover velcro (at each corner) from a costuming project.


Fourth, UPHOLSTER!!! (I love that word.) I think, looking back at this that I would have just laid out the cash for some batting. It’s your call. It’s all about the aesthetic of it. My finished product is kind of sleek. I think it would have had more of a finished look with the batting and you wouldn’t be able to see the table corners.
I wish I had photos of the actual upholstering. I was so excited to use the staple gun and Husfriend was outside. He was in charge of telling me to slow my roll and take pictures. So, I blame him. I decide on a simple folded corner. Faux leather can be cumbersome to work with.
Fifth, It’s time to tuft. (Another fun word.) Remember those long needles I hinted about earlier? These are they! And they will save your behind. I you look closely you can see the needle shoved through the heart of the table. (Dramatic much?) This is how you are going to get the button attached. Husfriend came in to help with this part, since it really is a two person job. Thread the button and it’s “tail” through the table and PULL! And When it’s through, pull it thought a regular button on the bottom on the table. This is going to anchor your tufted-ness. PULL and then PULL some more and then TWIST. The more you pull and the closer you get your covered button closer to the table, the more of a tufted look you are going to get. REPEAT until all buttons are attached or until your fingers fall off. Snip off wire.


Sixth, I pounded in the tacks. Before that Husfriend and I measured. We did every 1/2 inch. Do what you like. (We, also, lived on the wild side and used blue pen, the tacks are going to cover it. It felt so fracking wrong. Mom always told us to stay away from the furniture with pens, right?) Then, bang, bang, She BANGS! After, the banging is done, screw the legs back in. (Holy underpants, Batman. Never did I think I’d type that sentence.)


LASTLY, the BEST thing about completing any DIY. Standing back, ever so slightly smugly and saying,
“Look what I/We did!”


Now, I have a room that I decorated. It’s the first room, ever, that I’ve had full say. What can I say, Adulting has come late in life. BAH! Who cares. But this is my room. It’s where I go to play Diablo III, film and edit videos. And where I do adult things like pay the bills and ish.
I hope you enjoyed a little DIY-ness.
Stay Awesome,
Clare
Side Story:
After Husfriend saw the table completed, he surprised me with the faux leather futon cover. It’s kinda squizz, isn’t it.
I found pillow covers on eBay (the mermaid sequined, about $12 for both & grey feathery, about $3 for both), H&M (dusty light pink) and HomeGoods (the gold ones). The rug is from Wayfair about $70. The blanket is from HomeGoods about $23. The dusty pink swag curtains are from my Mom, so FREE!. The brown flowery sheers are from HomeGoods about $12/pair on Clearance. I made the flowers from an old candle jar from Target and flowers (on sale and coupons about $6) from Joann’s.

Beautiful!!!! You can make one for me on the next visit!
LikeLike
We can make one with the French script fabric we love! You need to order the table. And if you want it a little shorter? I know a guy with a table saw! 😂
LikeLike